
Golf Simulator Graphics Settings: Performance vs Quality Guide (2026)

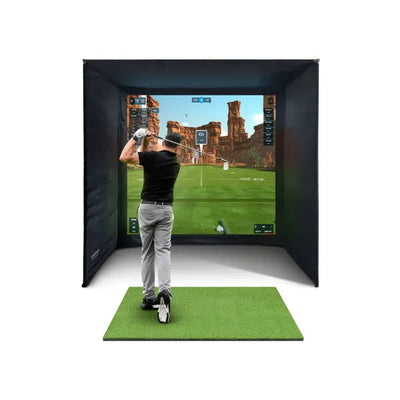
You have invested in a home golf simulator, built or bought a capable PC, and installed your favourite software. Now comes the question that stumps even experienced computer users: which graphics settings should you actually use? The wrong configuration can leave you with either a beautiful but stuttering mess or a smooth but ugly experience that fails to immerse. This guide walks you through every meaningful graphics setting in the three most popular UK simulator platforms, explains what each option does in plain English, and provides our recommended presets for different hardware levels.
Why Graphics Settings Matter for Your Home Golf Simulator
Golf simulator software renders complex 3D environments in real time. Every blade of grass, shadow, reflection, and cloud is calculated by your graphics card dozens of times per second. The settings you choose determine how much visual detail is rendered and how hard your hardware works to produce each frame. The goal is to find the sweet spot where your setup produces visually pleasing output at a consistent frame rate without drops or stuttering. For a home golf simulator, the target is sixty frames per second at your projector's native resolution.
Frame rate consistency matters more than peak frame rate. A simulator that alternates between eighty and thirty frames per second feels worse than one locked at a steady fifty. Inconsistent frame rates cause ball flight animations to judder, making it harder to follow your shot and breaking immersion. We want smooth, predictable performance above all else. If you are unsure about your hardware capabilities, our guide to simulator PC builds covers the recommended specs for each performance tier.

GSPro Settings: The Complete Guide
GSPro is the most popular simulator software in the UK, and its settings menu offers extensive customisation. The resolution setting should match your projector's native resolution, typically 1920x1080 for most setups. Setting a higher resolution than your projector supports wastes GPU power with zero visual benefit. If your projector supports 1440p or 4K, use that native resolution for the sharpest possible image.
The texture quality setting controls the detail level of course surfaces, trees, buildings, and objects. High textures use more VRAM but produce noticeably sharper visuals, especially on close objects like the green surface and nearby trees. If your GPU has eight gigabytes or more of VRAM, set textures to High. With six gigabytes, use Medium. With four gigabytes, use Low. The shadow quality setting has one of the largest impacts on performance. Ultra shadows can cost ten to fifteen frames per second compared to Medium. We recommend Medium shadows for most setups as the visual difference between Medium and Ultra is subtle on a projected image viewed from several metres away.
Anti-aliasing smooths jagged edges on 3D objects. FXAA provides the cheapest smoothing with minimal performance cost and is our recommended option for most setups. TAA provides better edge smoothing but can introduce slight blurring. MSAA provides the sharpest result but at a significant performance cost. For a projected image, FXAA is typically sufficient. The draw distance setting controls how far you can see across the course. High draw distance is important for tee shots where you need to see the fairway layout. Set this to High unless you are struggling for performance. For detailed software comparison, see our software comparison guide.
E6 Connect Settings Optimisation
E6 Connect uses the Unreal Engine and offers some of the most visually impressive simulator graphics available. However, it is also the most demanding software on your hardware. The quality preset system in E6 offers Low, Medium, High, and Ultra options. Our testing shows that the Medium preset provides an excellent experience for mid-range PCs, while High is achievable with an RTX 4060 Ti or equivalent at 1080p.

Within E6 Connect, the vegetation density setting has a huge performance impact. Dense trees and foliage require significant GPU power to render. If you are struggling for frames, reducing vegetation density from High to Medium can recover eight to twelve frames per second with a relatively minor visual difference during actual gameplay. The water reflection quality is another expensive setting that looks beautiful but costs dearly. Simple reflections at Medium quality look perfectly acceptable on a projected screen and save valuable GPU resources for more impactful settings like texture quality and lighting.
Awesome Golf Settings for Home Golf Simulator Use
Awesome Golf is a cloud-rendered platform that handles most of the heavy processing server-side. This means your local PC settings primarily affect the stream quality and overlay rendering rather than the 3D course visuals directly. The key settings here are your network bandwidth allocation and the stream resolution. For a stable experience, ensure your internet connection provides at least twenty-five megabits per second of consistent download speed. Set the stream quality to match your projector resolution and ensure your PC is connected via ethernet rather than Wi-Fi for the most stable connection.
If you experience occasional buffering or quality drops, reduce the stream resolution by one step. A 1080p stream that never stutters provides a far better experience than a 1440p stream that occasionally drops to low quality. Awesome Golf's local overlay settings for shot data and course information are rendered by your PC and can be customised independently of the stream quality.

Resolution, Refresh Rate, and Projector Matching
Your in-game resolution must match your projector's native resolution for the sharpest image. Running the software at 1440p on a 1080p projector does not improve the projected image and wastes GPU power. Conversely, running at 720p on a 1080p projector saves performance but produces a visibly softer, less detailed image. Always match native resolution for the best results on your home golf simulator display.
Refresh rate is less critical for a simulator than for competitive gaming but still matters. Most projectors operate at sixty hertz, meaning they display sixty frames per second. Setting your in-game frame rate cap to sixty ensures your GPU is not rendering unnecessary frames that the projector cannot display. This reduces heat, noise, and power consumption while maintaining perfectly smooth output. If your projector supports one hundred and twenty hertz, a higher frame rate cap provides smoother ball flight animations but requires significantly more GPU power. For projector selection guidance, see our projector guide.
Monitoring Performance in Real Time
Knowing your actual frame rate during gameplay is essential for making informed settings decisions. MSI Afterburner with the RivaTuner Statistics Server overlay is the standard tool for this. It displays your current frame rate, GPU temperature, GPU usage percentage, and VRAM consumption directly on screen. Enable the overlay, play a full round, and note the minimum frame rate during the most demanding scenes, typically lush tree-lined holes with water features and complex lighting.

If your minimum frame rate drops below forty-five, your settings are too aggressive for your hardware. Reduce shadow quality first as it has the highest performance-to-visual-impact ratio. Then reduce vegetation density, followed by anti-aliasing quality. Texture quality should be the last thing you reduce as it has the most visible impact on image clarity. Our buyer's guide covers the hardware needed for each quality tier.
Recommended Presets by Hardware Tier
For budget builds with an RTX 3060 or equivalent, we recommend the following universal settings across all software. Resolution at 1080p, textures at Medium to High, shadows at Low to Medium, anti-aliasing at FXAA, vegetation at Medium, water reflections at Low, and draw distance at High. This combination delivers a clean, smooth experience at a consistent sixty frames per second on virtually every course.
For mid-range builds with an RTX 4060 Ti or equivalent, step up to High textures, Medium shadows, FXAA or TAA anti-aliasing, High vegetation, Medium water reflections, and High draw distance at 1080p. At 1440p, reduce shadows and vegetation by one step. For premium builds with an RTX 4070 Ti or above, you can comfortably run High to Ultra settings at 1080p and High settings at 1440p or even medium settings at 4K resolution.

Optimising Your Home Golf Simulator Display Output
Beyond in-game settings, your PC's display output configuration plays a crucial role in visual quality. In the NVIDIA Control Panel or AMD Radeon Settings, ensure your output resolution matches your projector's native resolution exactly. Set the colour output to RGB Full Range rather than Limited Range to preserve shadow and highlight detail. If your projector supports HDR and your GPU does, enabling HDR can enhance the visual experience, though not all simulator software takes full advantage of it yet.
The connection between your PC and projector matters as well. Use an HDMI 2.0 or higher cable for 4K output, or a standard high-speed HDMI cable for 1080p. Cable length beyond ten metres can cause signal degradation, so use an active or fibre-optic HDMI cable for longer runs. Position your PC to minimise cable length where possible, as shorter cables provide the most reliable signal. If you are running your cable through walls or ceilings, ensure you use conduit-rated cables that meet UK building regulations. The display chain from GPU to projector to screen is only as good as its weakest link, so do not undermine excellent settings with a poor cable or connection. Consider investing in a quality HDMI switcher if you share the projector between your simulator and other entertainment sources, as this avoids the wear and tear of constantly swapping cables and ensures a clean signal path every time you fire up a session.
Common Issues and Troubleshooting
Stuttering that occurs every few seconds despite high average frame rates often indicates a VRAM shortage. Check VRAM usage in your monitoring overlay and reduce texture quality if it approaches your card's limit. Screen tearing where the image appears to split horizontally is caused by the frame rate exceeding the projector's refresh rate. Enable V-Sync in the software settings or in the NVIDIA control panel to eliminate this. Input lag that feels like a delay between your swing and the shot appearing on screen can be caused by V-Sync, triple buffering, or post-processing effects. Try enabling NVIDIA's Low Latency Mode in the driver settings to reduce this.
If your software crashes during graphically intensive scenes, check GPU temperatures. A GPU that exceeds ninety degrees Celsius under load may throttle or crash. Ensure your PC case has adequate airflow and consider adding additional fans. For room temperature management, our ventilation and heating guide covers keeping your simulator space comfortable. The FlightScope Mevo Gen2 and Foresight GC3 bundles pair with any PC tier for a complete home golf simulator setup. Browse the full golf simulator collection for options.
Frequently Asked Questions
What frame rate should I target for my golf simulator?
Sixty frames per second is the ideal target for most projector setups. Consistency matters more than peak frame rate, so a locked fifty is better than fluctuating between thirty and eighty. Use your projector's native refresh rate as your cap.
Do I need a 4K projector and 4K settings for a good experience?
No. At typical simulator viewing distances of two to four metres, the difference between 1080p and 4K is subtle. A well-configured 1080p setup with high textures and good anti-aliasing looks excellent. Save the 4K budget for a better launch monitor or impact screen instead.
Why does my simulator look blurry on the projected screen?
Blurriness is usually caused by a resolution mismatch between the software and projector, poor projector focus, or aggressive anti-aliasing settings like TAA. Check that your PC output resolution matches your projector's native resolution exactly, refocus the projector, and try switching to FXAA.
Can I use dual monitors with my simulator PC?
Yes. Running the simulation on one output to the projector while displaying shot data on a secondary monitor is popular. This requires minimal additional GPU power as the second display typically shows static data rather than 3D graphics.
How do I reduce input lag between my swing and the ball flight appearing?
Disable V-Sync if tearing is not a problem, enable NVIDIA Reflex or Low Latency Mode in driver settings, and ensure your software is running in exclusive fullscreen rather than borderless windowed mode. These changes together typically reduce perceived lag significantly.

Free Home Golf Simulator Design Consultation
Not sure on space, screen or launch monitor? Chat directly with Tom, OpenGolfer’s founder — he has designed hundreds of home setups and will tell you exactly what fits your room and budget.
- Send your room size (or a photo) — get a tailored layout and spec for your space, ceiling height included
- Personal replies from a real golfer, not a call centre
- Honest advice on what to buy — and what not to
Usually replies within the hour, 8am–8pm · prefer to talk? 02033 768500


Leave a comment