
Which Launch Monitor for Your Garden Golf Cage? The Budget Ladder

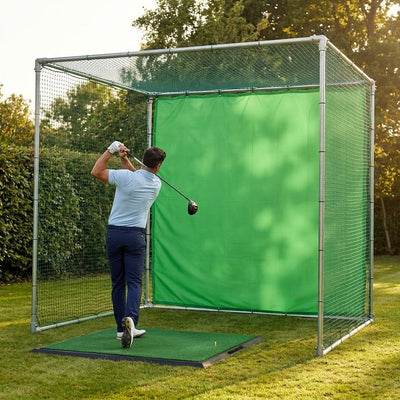
“It’s a minefield researching those things.” Kelvin sent me that on WhatsApp after a full week of launch-monitor research, while planning a garden range around our Pro Cage. He’s not wrong. The market runs from £200 to £20,000, half the spec sheets read like radar-physics papers, and nobody tells you whether the thing will actually work inside a 3m garden cage until after you’ve paid for it.
I sell all of these to go inside the exact cages we sell, and I talk customers through the choice every week. So here is the ladder — four rungs, each a genuine step up, plus the one placement fact that decides more than price does and the one returns caveat every customer thanks me for mentioning before checkout instead of after.

Radar or camera: the split that matters more than money
Before you look at a single price, understand this, because it’s the thing that catches people out. Every monitor worth putting in a cage belongs to one of two families, and they want completely different amounts of room.
Radar units sit behind the ball and track it (and the club) with Doppler radar. They need space behind you and a stretch of ball flight in front to read — roughly 2.4m behind the ball, which in a 3m cage usually means the unit lives just outside the back of the cage on the garden side.
Camera units sit just in front of and beside the ball and photograph the strike at impact. They need almost no room — about 0.6m — so they drop into any 3m cage with space to spare, whatever’s behind you.
That single distinction is why the R50 works in a tight courtyard where a Mevo would be gasping for room. Here’s the geometry, drawn from my own setup rather than a brochure:
The budget ladder at a glance
| Model | Type | Rough price | Needs a PC? | Best for |
|---|---|---|---|---|
| ShotScope LM1 (below the ladder) | Radar | ~£200 | No | First honest carry numbers |
| Garmin R10 | Radar | ~£420 | No (phone/tablet for sim) | Budget sim play + practice |
| FlightScope Mevo Gen2 | Radar | ~£1,199 | No (phone/tablet) | Serious practice — our most popular |
| Garmin R50 | Camera | ~£4,299 | No — screen built in | Switch-on sim, fits any 3m cage |
| Foresight GC3 | Camera | £7,500 | Yes, for sim play | Tour-grade data, tight spaces |
Start here if the budget’s tight: ShotScope LM1 (~£200)
Below the ladder proper, but I won’t pretend it doesn’t exist, because for a lot of people it’s the right first move. A sub-£250 radar like the ShotScope LM1 gives you ball speed and carry distance — the numbers that turn aimless ball-bashing into actual practice. No spin analysis, no simulator, but it answers the one question a garden cage should answer: how far did that really go? Buy the cage and mat properly, add something like this, and climb the ladder when the practice habit is real. Nobody ever regretted spending their first budget on a solid station and honest numbers.
Rung 1 — Garmin R10 (~£420): the value pick of the whole market

If I had to hand one monitor to a first-time cage owner and walk away, it’d be this. The R10 is a genuine Doppler radar for around £420 — it gives you reliable carry and clubhead-speed trends, adds estimated club data, and, crucially, supports simulator apps, so it moonlights as a virtual-round machine on a phone, tablet or laptop.
Be honest with yourself about the spin numbers: they’re estimates rather than measurements. If dialling in spin-calibrated wedge distances is the whole point for you, that lives one rung up. But for “I want trustworthy carry numbers and the odd nine holes at Pebble without spending a grand,” nothing touches it. It wants the standard radar room — about 2.4m behind the ball.
Rung 2 — FlightScope Mevo Gen2 (~£1,199): the one in my own garden

This is the one I hit off at home, and the one most of our cage customers end up buying. The Mevo Gen2 is where radar stops estimating and starts measuring — carry, ball speed and spin that agree with a proper range session to within a club. That’s the difference between numbers you glance at and numbers you build a practice plan on.
It’s the sweet spot: serious, calibratable data without simulator-studio money. If you’re building a station you’ll still be practising on in five years, this is the rung I steer people to nine times out of ten.
What the FlightScope Pro Package actually adds
This is the exact question Kelvin spent days trying to pin down, so here it is in plain English. The base unit gives you the ball data above. The Pro Package software upgrade unlocks the club-delivery picture: club path (in-to-out or out-to-in through impact), face angle (where the face pointed at the strike), the D-plane relationship between the two — which is what actually explains your shot shape — and full 3D flight on every shot. If you want to know why you hit that fade rather than just how far it flew, that’s where the answer lives. If you mainly want carry and wedge distances, the base unit is plenty, and you can upgrade later. Read the returns caveat below before you tick that box, though.
Rung 3 — Garmin R50 (~£4,299): the camera with a simulator built in

Now we cross the family line into cameras. Different family, different life. The R50 is a camera unit that sits about 0.6m in front of the ball — and the party trick is a touchscreen and full simulator software built into the unit itself. No PC, no laptop, no app-pairing faff. Switch it on and you’re playing a course inside your cage in under a minute.
Because it needs no space behind you and barely any ball flight, it fits any 3m bay with room to spare, which makes it the answer for tight or short gardens where the radar geometry simply won’t stretch. At this price it’s as much a family simulator as a practice tool — and for a lot of buyers, that’s exactly the point.
Rung 4 — Foresight GC3 (£7,500): tour-grade data, camera-tight footprint

The top of the ladder. The GC3 is a photometric unit — it photographs club and ball at impact rather than tracking flight — and it’s the kind of kit you’ll find in professional fitting bays. The data is about as good as it gets outside a tour truck: directly measured, repeatable, no radar guesswork on spin.
Two things to weigh for a cage. First, being a camera unit, it sits roughly 0.6m beside the ball, so it slots into any 3m bay no matter how tight the garden behind you — a real advantage over the radar rungs. Second, unlike the R50 above it, you’ll want a laptop or PC to run simulator courses. Buy the GC3 if data quality is the hill you’re on and you’re happy running it from a computer; if you want plug-and-play, the R50 is the answer.
The returns caveat customers thank me for
Before you buy anything: launch-monitor hardware comes with a 14-day return window, but FlightScope software packages are non-refundable once activated — and that includes the Mevo Pro Package. It’s not our rule, it’s how FlightScope licences work, but I’d far rather you heard it from me than discovered it after checkout.
So the advice I give every single Mevo customer: if you’re at all unsure, buy the unit on its own first, hit balls for a fortnight, then add the Pro Package once you know you want the club-delivery data. You lose nothing by upgrading later; you can’t un-buy the software. Customers regularly tell me we’re the only retailer who mentioned it upfront. Strange compliment. I’ll take it.
So which rung is right for you?
My steer, for a 3m garden cage:
- “What’s the least I can spend to make practice count?” → a sub-£250 LM like the ShotScope LM1.
- “Numbers I trust plus the odd virtual round, no silly money.” → Garmin R10.
- “A proper station with data I’ll rely on for years.” → FlightScope Mevo Gen2. This is the one most people should buy, and the one most do.
- “Fitting-bay-grade data and I’m happy running a laptop.” → Foresight GC3.
- “Switch-on simulator the whole family will use, in a tight garden.” → Garmin R50.
Whichever rung you pick, remember the monitor is only ever as good as the strike it’s reading. A stable stance, a consistent lie and contained ball flight — that’s the cage and mat’s job. Get the heavy-duty garden golf cage and mat bundle right first, climb the monitor ladder second. You can browse the full range in our launch monitor collection, and the wider market comparison lives in our 2026 launch monitor guide.
Build the station first, then add the numbers
The Pro Golf Cage & Hitting Mat Bundle — 42mm galvanised steel, archery-grade impact panel, driving-range mat and jigsaw base from around £735 — is the platform every rung of this ladder stands on. It ships with our free 90-day practice programme.
Shop the Pro Golf Cage Bundle →Frequently asked questions
Which launch monitor fits inside a 3m garden golf cage?
All of them, with planning. Camera units like the Foresight GC3 and Garmin R50 sit ~0.6m in front of the ball and fit any 3m cage. Radar units (ShotScope LM1, Garmin R10, Mevo Gen2) want ~2.4m behind the ball, so you need that strip of garden behind your hitting position — most gardens have it once you measure properly.
Radar or camera launch monitor for a garden cage?
If your garden is short or you want plug-and-play, go camera (R50, or GC3 with a laptop). If you’ve got the depth behind your mat and want the best value, go radar (R10 or Mevo Gen2). The camera family fits tighter spaces; the radar family gives you more monitor per pound.
Is the FlightScope Pro Package worth it?
If you want to know why the ball curves — club path, face angle, the D-plane and 3D flight — yes. If you mainly want carry distances, start with the base Mevo Gen2 and upgrade later. The software is non-refundable once activated, so upgrade when you’re sure, not before.
Can I return a launch monitor if it doesn’t suit me?
The hardware, yes — 14-day returns on units. FlightScope software packages are non-refundable once activated, which is exactly why I suggest buying the unit first and the software second.
Do I need a PC or laptop to run any of these?
Not for the Garmin R50 — the screen and simulator software are built into the unit. The Garmin R10 and Mevo Gen2 pair with a phone or tablet for sim play. The Foresight GC3 needs a laptop or PC to run simulator courses.
Still stuck between rungs? Message me on WhatsApp with your garden dimensions and budget and I’ll tell you straight which monitor fits your cage — and send you a free 3D setup design if you want one. Message Tom on WhatsApp or call 020 3376 8500 (8am–8pm, usually a reply within the hour).

Free Home Golf Cage Setup Design Consultation
Not sure on size, base or mat? Chat directly with one of our experts — real golfers who practise from their own garden cage most days and has designed hundreds of home setups.
- Send a photo of your garden with rough measurements — get a tailored layout and spec for your space
- Personal replies from a real golfer, not a call centre
- Honest advice on what to buy — and what not to
Usually replies within the hour, 6am–10pm · prefer to talk? 02033 768500


Leave a comment