
Garmin R50 Simulator Setup: Room Size, Screens & the Full Package (UK)

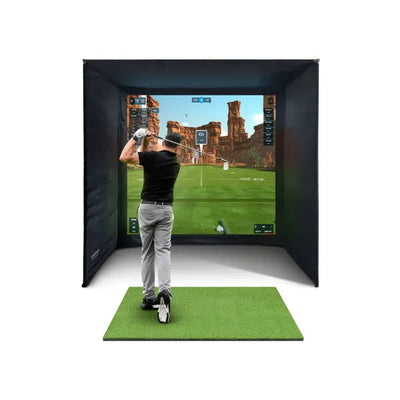
The Garmin R50 has a rare quality among launch monitors: it works properly at every stage of a simulator build, from a bare unit in front of a garden net all the way to a full enclosure with projector and impact screen. That flexibility is a gift, but it also means R50 buyers face more setup decisions than most, and I answer some version of “what do I actually need around it?” on WhatsApp most weeks. This guide is the complete answer for UK rooms: the dimensions that matter, the enclosure and screen options at each budget, when the built-in touchscreen is genuinely enough, and an honest breakdown of the R50 Full Package at £7,099 versus assembling the same room yourself.

Start with the room, not the receipt
Every good simulator build starts with a tape measure, and the R50 makes the maths kinder than most. Because it is a camera unit that sits in front of the ball, you do not need the ~2.4m of clear space behind the ball that radar units demand, which is the single biggest reason short UK garages that fail for radar succeed for the R50.
Three measurements decide everything. Height first: you need enough ceiling for your tallest player to swing driver flat out, and this is the least negotiable number in the whole project, because a driver you cannot swing indoors turns your simulator into an iron-only room. Width second: enough for a comfortable stance and, ideally, for both left- and right-handed players to hit from a central mat, something the R50 supports without repositioning. Depth third: ball-to-screen distance plus space behind you to swing. Our room size guide walks through the exact figures for each scenario, and I would read it before spending a pound. When I installed a customer’s R50 room in Chester this summer, the plan changed twice at the measuring stage, and both changes were cheaper on paper than they would have been in hardware.
Decision one: built-in touchscreen or projector?
The R50’s built-in 10” touchscreen runs Garmin’s Home Tee Hero simulation with no other hardware, and for a lot of setups, especially net-based practice rooms and garden setups, it is honestly enough. You see the course and your numbers right behind the ball, and the whole system is one plug and one unit. My advice to most first-time builders is to start here even if a projector is the eventual dream, because it lets you spread the spend and learn what you actually want from the room.
The projector route is what turns the room from a practice space into somewhere people want to spend an evening. Ball flying into a proper impact screen with the course filling your wall is a different experience, and it is what most people picture when they say “golf simulator”. It needs an enclosure with an impact screen and a projector matched to your room’s throw distance, plus a PC only if you want third-party software such as GSPro or E6; the R50 itself can output Garmin’s own sim to an external display, so the computer is a third-party-software requirement rather than a projector requirement. Our guide to choosing a simulator projector covers the throw-distance and brightness decisions in detail.
Decision two: which enclosure and screen
The enclosure is the part people under-research and then wish they hadn’t. It does three jobs: holds the impact screen taut, contains the occasional shank, and darkens the area behind the screen so the projected image looks rich rather than washed out. Here is the UK lineup we install, cheapest first.
| Enclosure | Price | Best for |
|---|---|---|
| GolfBays EasySim | £999 | Budget builds, first projector rooms |
| GolfBays SimBox | from £1,161 | Awkward room sizes, 7 footprint options |
| SimSpace Sim range (Sim 1–5) | from £1,299.01 | The standard dedicated-room build; five footprints priced by size, with the full-height 3×3×3m Sim 5 at £1,599.99 |
| SimSpace UltraMAX | from £1,499.99 | Best image quality; high-contrast grey screen |
On screens, if you buy an enclosure that takes a separate screen or you are upgrading later, the SimSpace Elite (£199.99–£279.99) is the entry point and the SimSpace Platinum (from £399.99, priced by size) is the one I fit when image quality is the priority. The screen is where cheap shows up fastest: a poor screen bounces balls harshly, creases visibly under the projector and wears at the impact zone. For a fuller treatment of the trade-offs, our impact screens and enclosures guide is the deep dive.
A note on safety and British reality: leave sensible clearance behind the screen to a solid wall, and if the room doubles as a garage or storage space, net side barriers earn their keep the first time a toe-strike goes sideways. Most of the enclosures above offer side-barrier or containment options for exactly this reason, so check the product page for your chosen footprint.
Decision three: the £7,099 full package vs self-assembly
Our Garmin R50 Full Package from £7,099 bundles the R50 (£4,299 on its own) with an enclosure, impact screen, projector and mat as one matched build. So is the package worth it against picking parts yourself? The honest arithmetic: the package’s value is less about a headline discount and more about compatibility risk. The expensive mistakes in self-assembled rooms are almost never the launch monitor; they are a projector whose throw distance doesn’t suit the room, a screen that arrives a size adrift of the enclosure, and a mat that sits proud of the floor at a different height from the plan. We found the buyers who most appreciate the package are first-time builders who want one delivery, one point of accountability and a room that works on day one. The buyers who should self-assemble are the ones who already own components, have unusual room dimensions that need a specific enclosure footprint, or genuinely enjoy the research. Both are legitimate; I have built both kinds of room and the finished golf is the same.
If you go the PC route for GSPro or E6 now or later, budget for a machine with proper graphics; our sim-spec laptop at £1,595 is the known-good option we test against. And on either route you can spread the cost at checkout with Klarna or Clearpay rather than finding it all at once.
The build order that avoids regret
After a few years of installs, here is the sequence I recommend. Measure the room and confirm driver height with a real swing, not an estimate. Choose touchscreen-first or projector-first honestly, based on how you will use the room this winter, not the fantasy version. Pick the enclosure footprint the room dictates, then the screen tier the budget allows, then the projector to match the throw distance that enclosure creates. Mat and flooring come next, and the PC comes last, because it is the easiest piece to add later and the R50’s touchscreen keeps you playing meanwhile. Buyers who run this order almost never come back with a problem; buyers who start from the projector spec sheet quite often do.
Don’t forget the floor
Two setup details rarely make the shopping list and always make the difference. The first is the mat: the R50’s cameras want the ball presented consistently, and a proper tour-density hitting mat gives you that along with joints that survive a winter of practice, which is why every package we build includes one; our hitting mat guide covers the options if you are speccing your own. The second is lighting. Photometric units like consistent, even light on the hitting area, so avoid a single bare bulb directly over the ball casting hard shadows, and if the room is a garage, a couple of cheap LED battens either side of the bay transform both the camera’s life and yours. Neither item costs much against the rest of the build, and both are miserable to retrofit after the enclosure is up, so decide them on the plan, not after the first session.
Frequently asked questions
What size room do I need for a Garmin R50 simulator?
Less than for radar units, because the R50 sits in front of the ball rather than needing ~2.4m behind it. The binding constraints are ceiling height for a full driver swing and enough depth for ball-to-screen distance plus your swing. Measure first; our room size guide has the specific figures.
Do I need a projector, or is the built-in screen enough?
For solo practice and casual course play, the built-in 10” touchscreen is genuinely enough and needs no extra hardware. For the immersive big-screen experience and group evenings, you will want an enclosure, impact screen and projector, plus a PC for third-party software.
What is in the £7,099 R50 Full Package?
The R50 launch monitor with an enclosure, impact screen, projector and hitting mat, specified as one matched setup from £7,099. It exists to remove the compatibility research and deliver a working room in one order.
Can I start simple and upgrade the setup later?
Yes, and I recommend it for most first-time buyers: R50 into a net using the touchscreen first, then enclosure, projector and PC as separate later stages. Nothing about starting simple locks you out of the full room.
The verdict
Build the room around the two things you cannot change later, ceiling height and floor space, and let the R50’s flexibility handle the rest. If you want the finished article in one decision, the full package from £7,099 is the clean way to get there; if you want to stage the spend, the R50 plus a net today and the enclosure at Christmas is every bit as sensible. The only wrong version is the unmeasured one.
Not sure which option fits your space or budget? Message Tom on WhatsApp for a free consultation — no obligation, real answers from someone who installs this kit weekly.

Free Home Golf Simulator Design Consultation
Not sure on space, screen or launch monitor? Chat directly with Tom, OpenGolfer’s founder — he has designed hundreds of home setups and will tell you exactly what fits your room and budget.
- Send your room size (or a photo) — get a tailored layout and spec for your space, ceiling height included
- Personal replies from a real golfer, not a call centre
- Honest advice on what to buy — and what not to
Usually replies within the hour, 8am–8pm · prefer to talk? 02033 768500


Leave a comment